Tag Archives: arduino

Christmas tree – Arduino Leds

Video: https://youtu.be/7wwv_Az_uWw

Actually this is a project which I started last year and was not able to finish it then.

Using WS2811 led lights (not strips) I thought about making a Christmas tree light being able to control every single led using an Arduino. This is actually very simple. For about 100 lights, I used a 10A power source just to be sure. Also next year I might add another 50 lights to it.

The best part about it is the programming. I found a lot of programs online. Took the nicest one, combined and tweaked them, and here is the result…

Fire lamp

I found a lot of intersting ideas on the internet on how to make a fire simulation lamp using WS2812c programmable leds and Arduino. So I had to try this too. Spice up the romance that is 😉

I found a strip with leds very close put together, so the effect would also look nice.  Everything is powered by a 5v power bank, so you can just take it with you wherever you want to set a romantic mood 😉

To do: make a lamp with white glass around the electronics to diffuse the light from the leds so not every single one is visible.

I used the NeoPixel library to program the leds, also I used parts of code I found on the internet and adapted it. Also a Arduino Nano was enough to control all 140 leds alligned in groups of 20.

The electronic layout looks something like this, but I used 7 rows of 20 leds each:

Also if someone is interested in the code, here it is attached. Of course it can be improved a lot. I also plan to make multiple modes of this lamp to be able to select by button fire, lava lamp, snow flakes, etc…

Automating Christmas Trees (Attiny/Arduino)

Christmas is coming and everyone gets out all decorations and lightnings from the basement. It’s a wonderfull time of the year to remember every light bulb from the lightning, which was broken last year, and when there was no time to fix it, etc.

IMG_20161211_192514

Also to remember which decorations were not so appreciated. This is the case with our two little trees which we got for the childrens room. They had to be turned on every evening and off after going to sleep. An unnecessary process which I wanted to fix.

I remembered some time ago I controlled a simple light with a little Attiny85. This had to be done again.

I used a Arduino Uno as a programmer for the Attiny. I had to remember the whole process again, so I’ll better write it here for the future.

Arduino softare has in properties a field for the link to get additional board managers. There I added: https://raw.githubusercontent.com/damellis/attiny/ide-1.6.x-boards-manager/package_damellis_attiny_index.json

In the boardmanager I installed it. I uploaded AndroidISP into the Android Uno, connected the Attiny like in the picture, and then uploaded using the programmer the following code:

void setup() {  pinMode(0, OUTPUT); }
void loop() {
  digitalWrite(0, HIGH);
  delay(21600000);
  digitalWrite(0, LOW);
  delay(64800000);
}

A simple program to turn the tree on for 6 hours and off for 18. This means if started in the evening at 18:00, it will always turn on at 18:00 and off at 00:00.

The electronics in the tree couldn’t have been easier to understand and adapt.

Didn’t test it yet, but I hope it works good enough even using the Attiny internal clock.

Ultrasonic staircase illumination

Just the beginning of another of my projects.

Some time ago I thought about making a staircase illumination using a programmable LED strip, which should only light up near the person going up/down the stairs.

So the last idea was to use an ultrasonic ranging module to find out the persons position on the stairs, which then triggers the corresponding LEDs to light up.

Parts used:

  • Ultrasonic ranging module HC-SR04
  • Arduino
  • WS2812B programmable LED strip

Todo:

  • make some trailing effect for the LEDs to go out smoothly after person passes by
  • put strip in a frame and minimize the electronics
  • replace Arduino with ATMega328

Firefighter truck painting

http://www.instructables.com/id/Firefighter-truck-painting/

FB0VV2II7VQKSJZ.LARGE

And another long overdue project of mine, which started with us painting my son’s room.

My son also wanted to have a firefighter truck painted on his wall. But since I had some electronics stuff on my mind which I wanted to try out anyway, I promised him much more than a painting.

The idea behind, is to have a somehow 3d painting, with lights, and more states of programming. I decided to go with this:

  • Idle mode: all lights are off, but if the light sensor senses no light, the headlights go on 20% of their power
  • Headlight mode: headlights go on 100%
  • Action mode: all lights animated somehow like a real firefighter truck (see video)

Cycling through all actions is done with a touch sensor on the lower left part, near the wheel.

VR Controller (Step 1: Trials)

All the fuss theese days about VR really put me in the mood to try at least something from all the offers which appear on the market. Of course you can go directly for a Oculus, but even that is still only a development kit. So I decided to start small not spending too much from the start, since I didnt know if I like it. So I bought a Google Cardboard. This one is about the cheapest VR you can get 🙂 since you put your phone into it, load some special apps and games, and you have VR. And I have to say I was amazed.

If you want more than just cardboard, you can go for Durovis Dive, which is basically the same thing 5x more expensive, but, and here comes the interesting part, it comes with the Dive SDK for Unity3D which allows you to make a 3D world for the glasses in about 10 minutes. And it really didnt take longer.

Ok, now you have a full VR experience (if Oculus, Dive or Cardboard) but your hands still hanging there, your actions are still limited on (in my opinion) very old-school HIDs (keyboard, mouse, gamepad, etc.).

Some times ago I started to tinker around with electronics components. Still have pretty basic knoledge about electronics, and don’t understand most electronics signs 🙂

And it got me thinking. Given an Arduino, a bluetooth module, some sensors fixed on my body (like tilt sensor, gyro sensor, compass module, and a few buttons), what could stop me to make a next gen game/fitness/generic controller?

My ideea is to do a lot of stuff with it: make a fitness app which will be controlled by running on a treadmill (or using a workout bike). Something like the old Nintendo Wii and the running game from Sports. Or a game like Temple Run, in which running the treadmill faster, gets you faster in the game. Or a shooter where you really run… etc.

For this I would like to create a game controller which records the leg movements, direction, body position, etc. which would then influence the actions in the game. A lot of detals I still need to work out.

I would like to be able to record more then a conventional controller does (more than just up, down, left, right, etc) that’s why I would like to build one and not buy one and break it apart and hack into it. That, and for kicks 😉

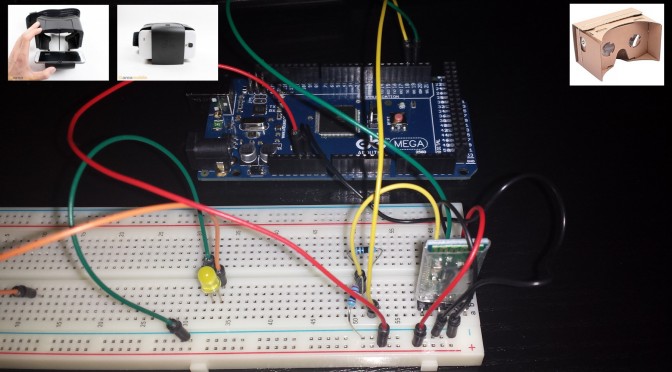
STEP 1:  Gather all hardware needed

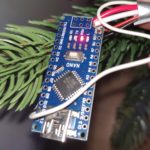
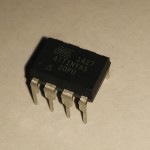
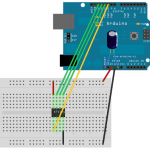
Well, not as easy as it sounds. I started with an Arduino Uno thinking it will be enough. Had to upgrade to Arduino Mega since it has 3 serial ports, and the SoftwareSerial support on the Uno wasn’t working so smooth. And the reason is the next module. Until now I thought a HC-05 bluetooth module would be enough. And it is up to a point. It only supports SPP for communication. It wasn’t hard to  write a little code on the Arduino, connect it to my smartphone, and use it as a little chat aplication. But as soon as I wanted to connect it as a keyboard or mouse, the trouble started. Using AT commands I configured every relevant flag on the HC-05, only to find out the it actually doesn’t support the bluetooth HID profile, which would allow me that. For that I would need at least a Bluesmirf RN42-HID or a BlueGiga WT12 module, which support both SPP and HID. Or to flash a new firmware on the HC-05 (a really messy solution)

So I can either upgrade to a better bluetooth module, or use the HC-05 in SPP mode, and write an andoid driver app, which converts the messages from Arduino into HID events and deliver them to any Android app. But for this a rooted phone is needed (no problem either).

(… to be continued)