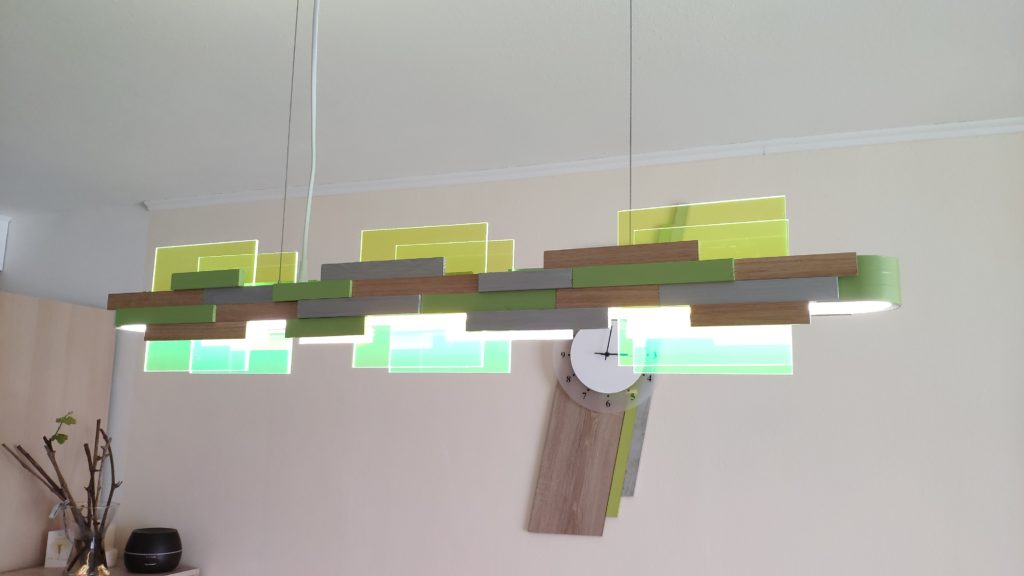
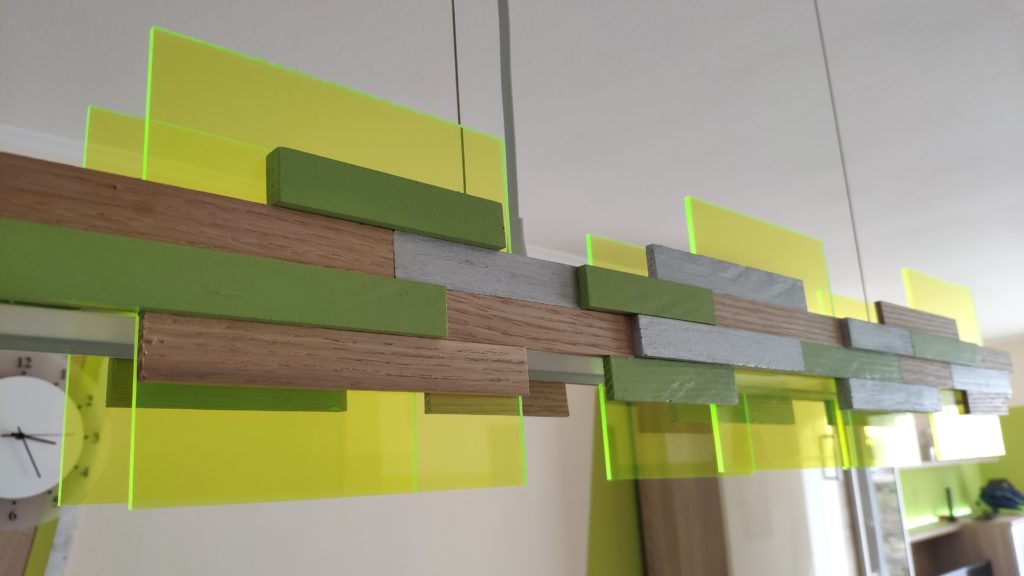
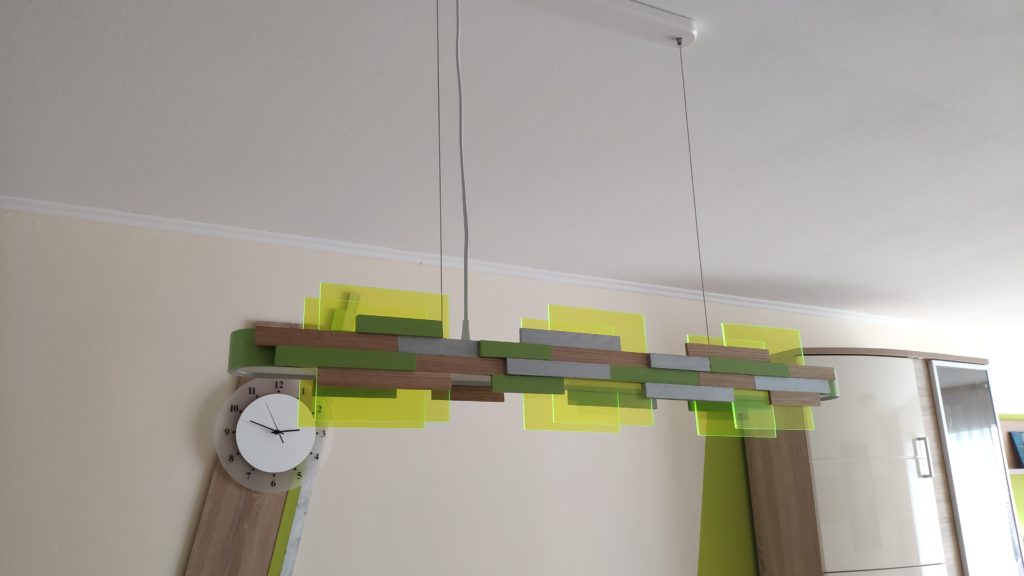
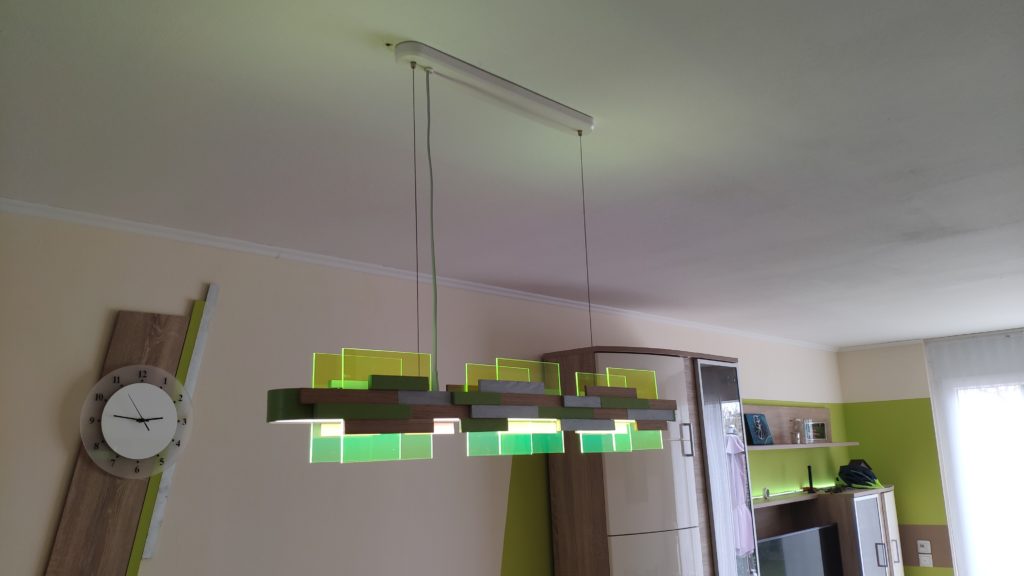
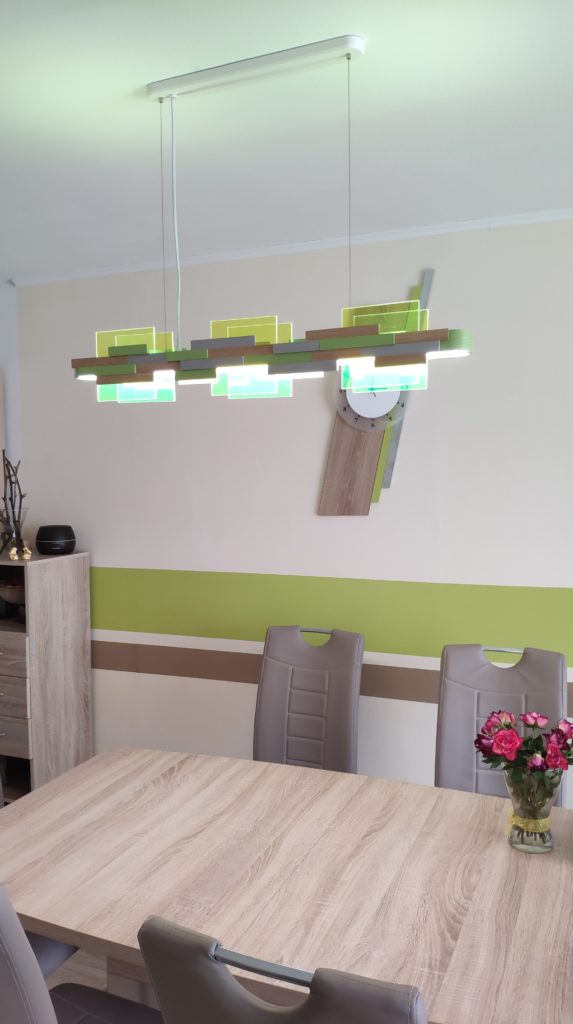
Needed a new lamp for the table and didn’t find anything to go with the design of my new living room. So I decided to start with this smart lamp from Xiaomi and decorate and paint it until it fits.
Category Archives: Lighting

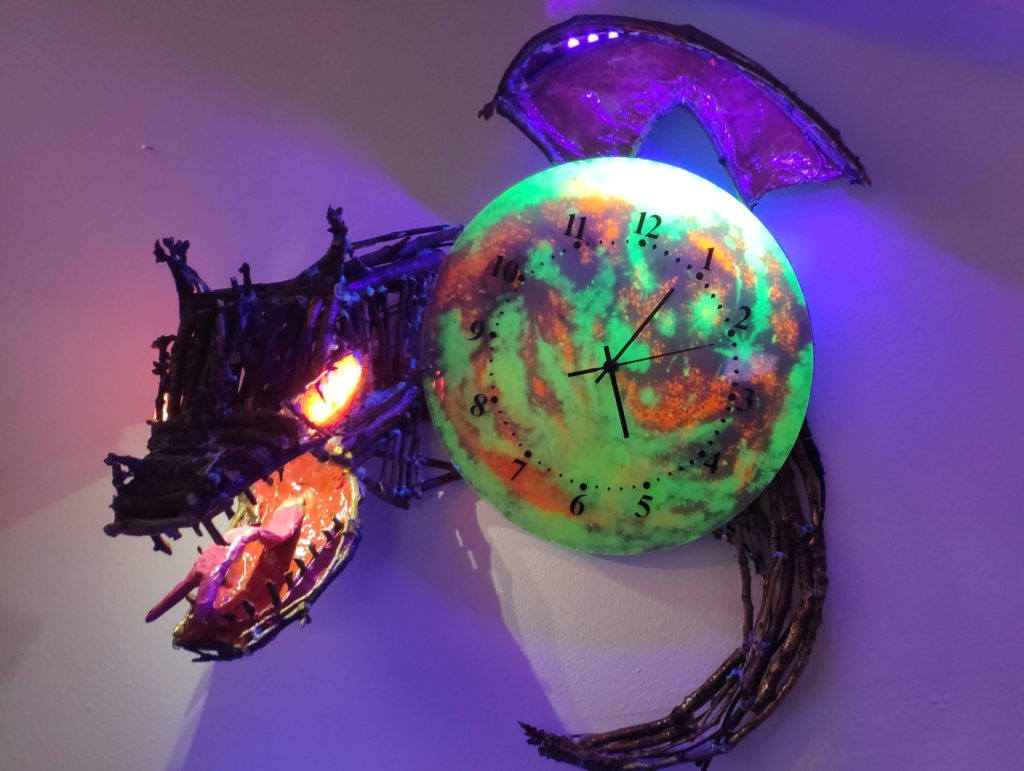
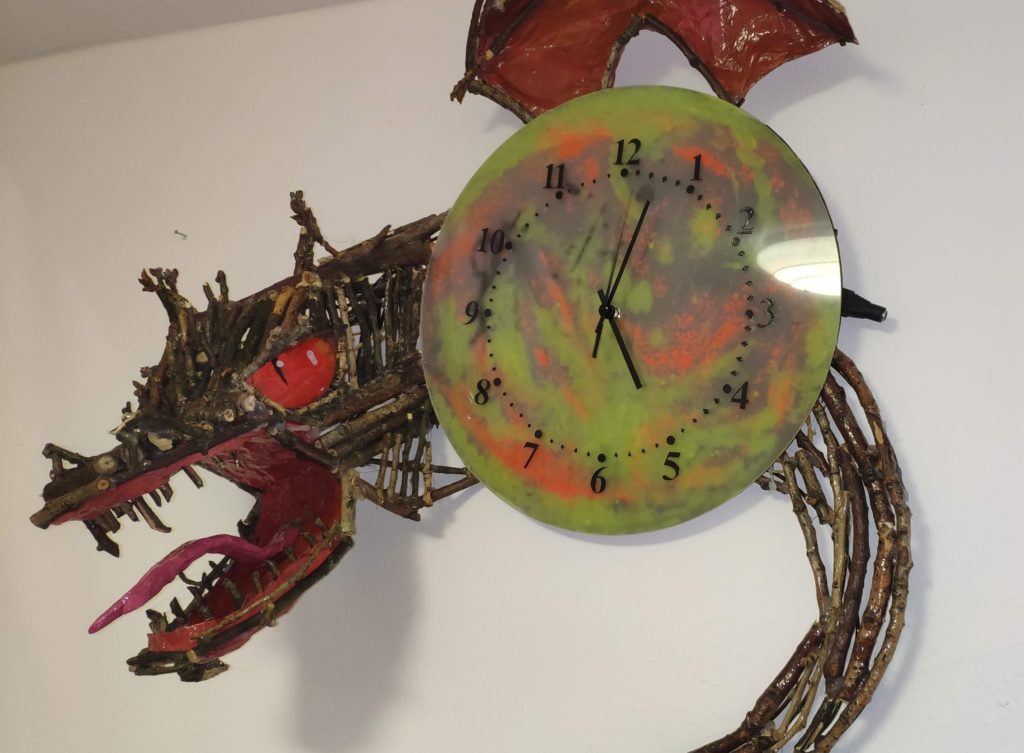
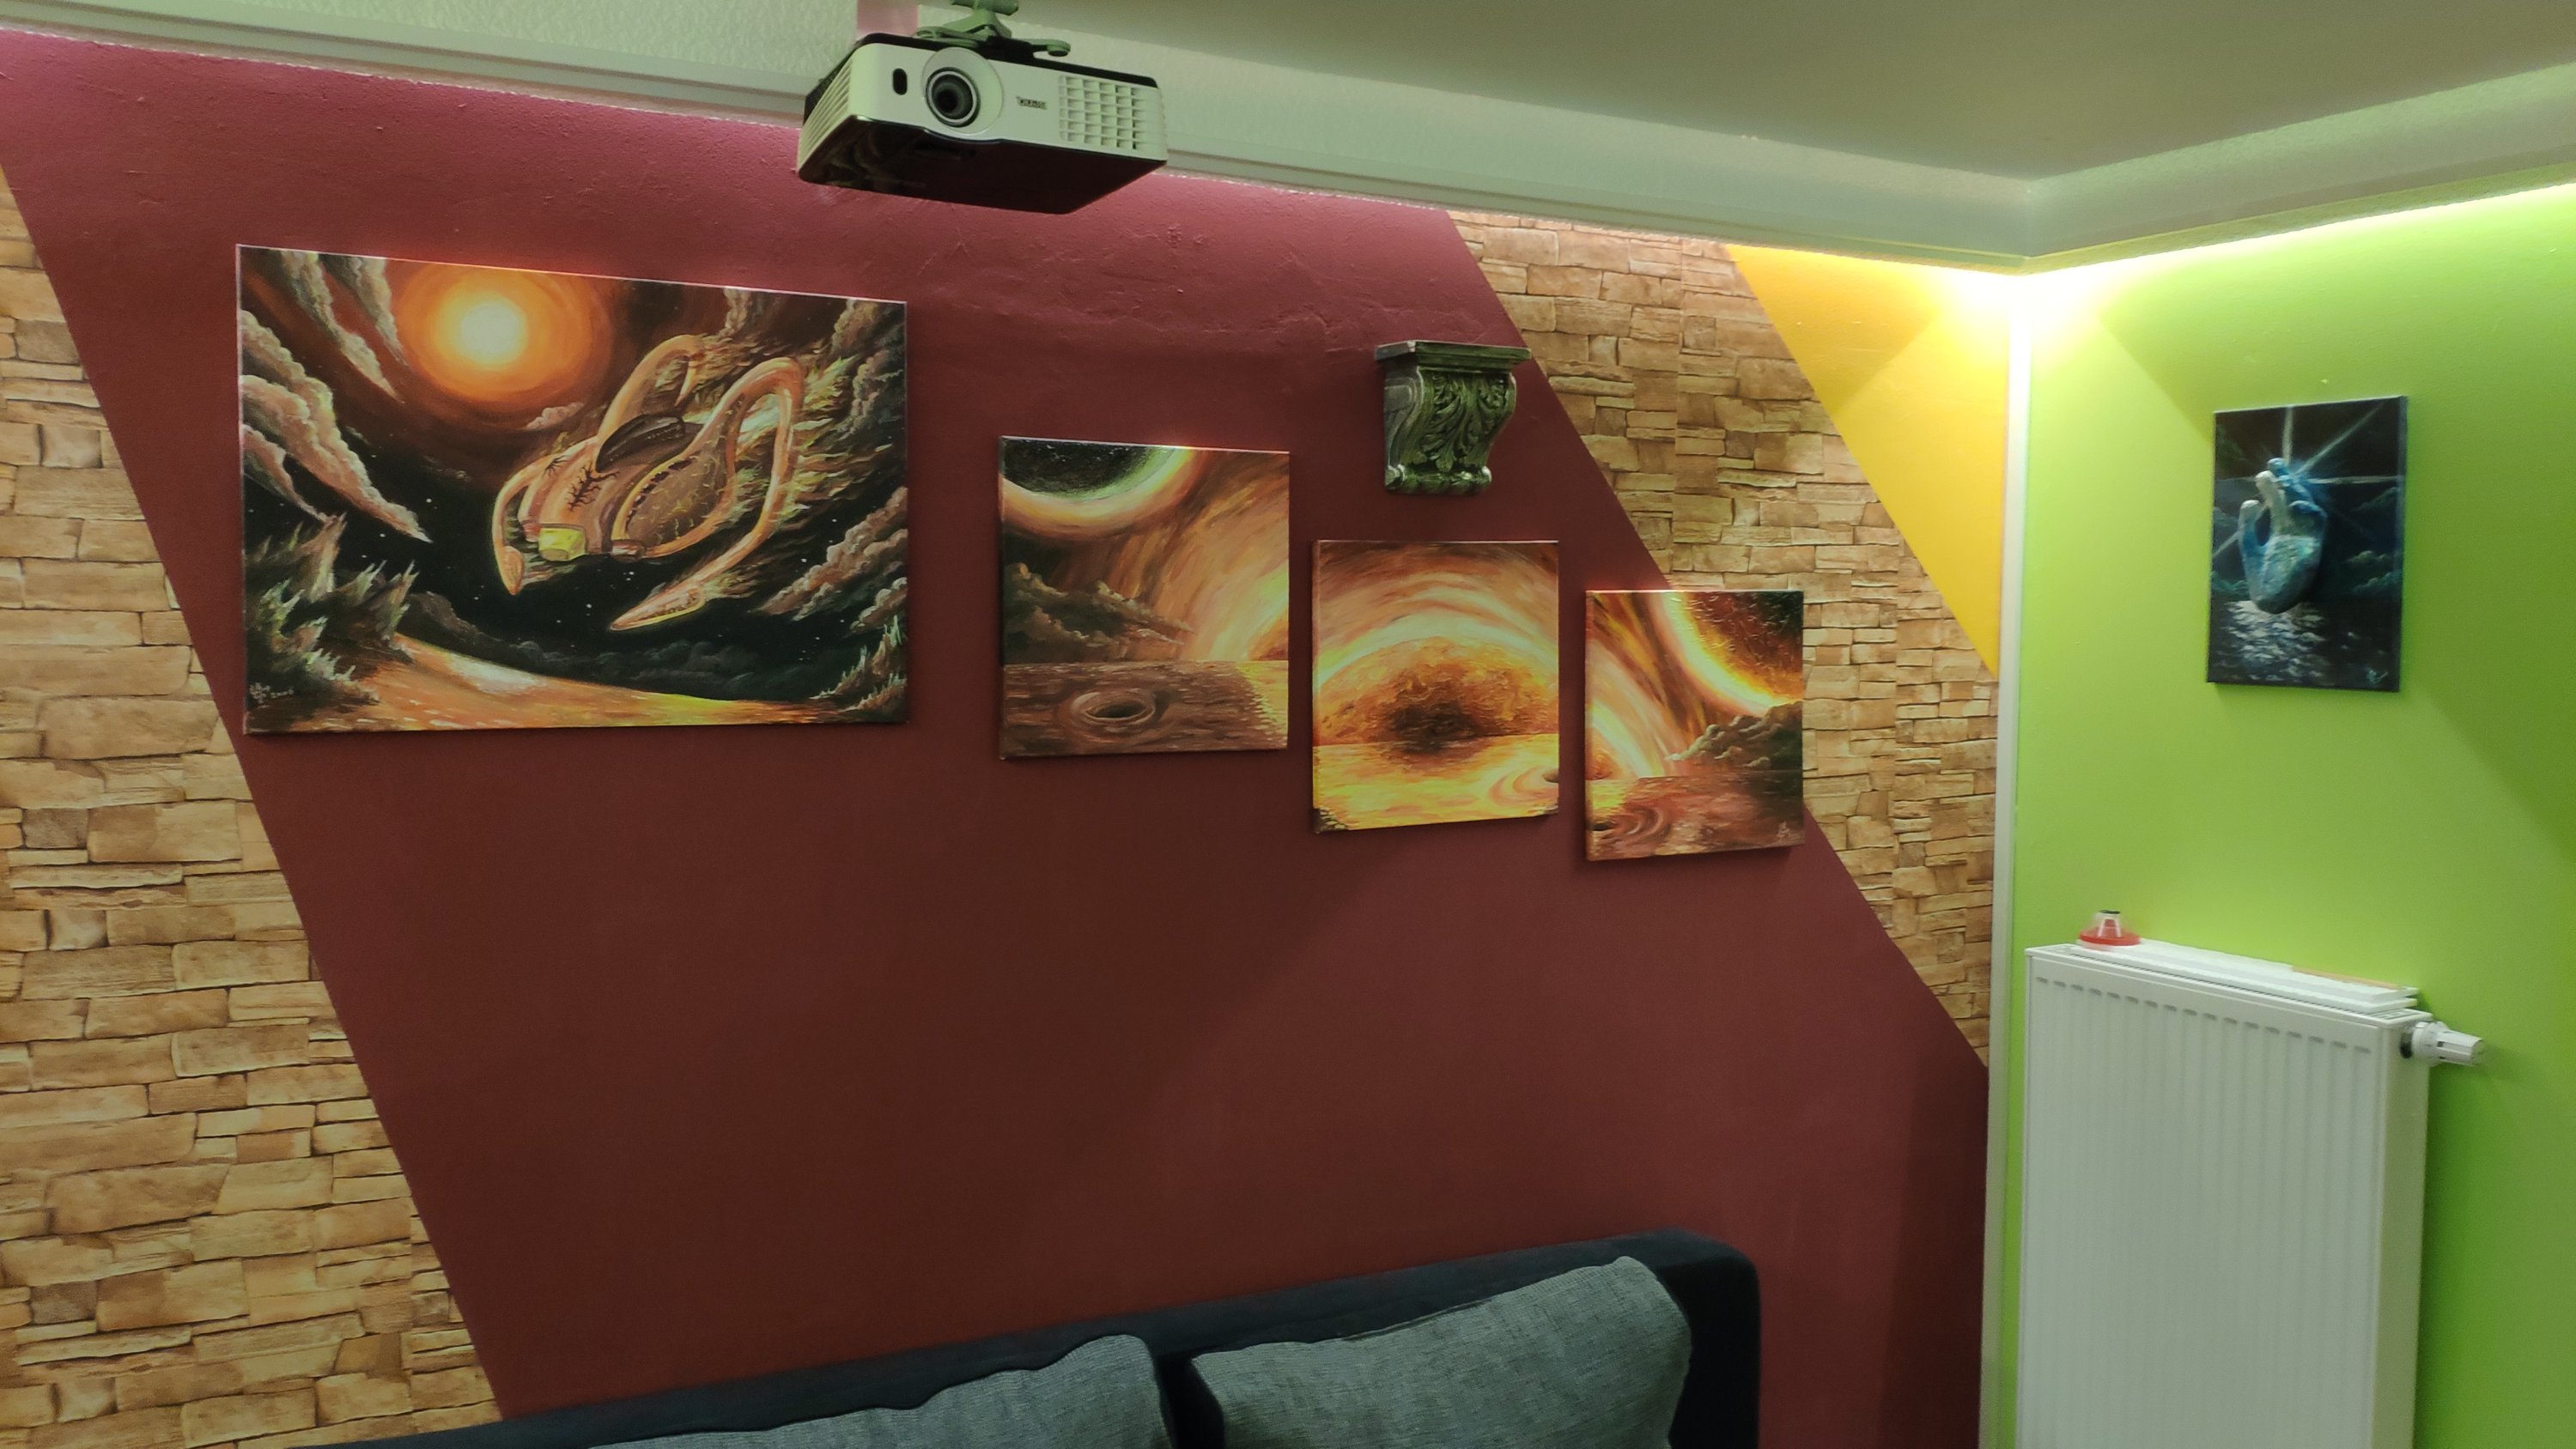
Bone Dragon Moonlight Clock

Posted also on:
https://www.instructables.com/id/Bone-Dragon-Moonlight-Clock/
Entered in contest: https://www.instructables.com/contest/clocks2020/
Some time ago I built a clock for my living room, since I found nothing to buy which had at least tolerable designs 🙂
Of course my son seeing this had a request of his own. So to summarize, he said he wants:
- a radio controlled clock
- with a dragon on it
- on top of a moon
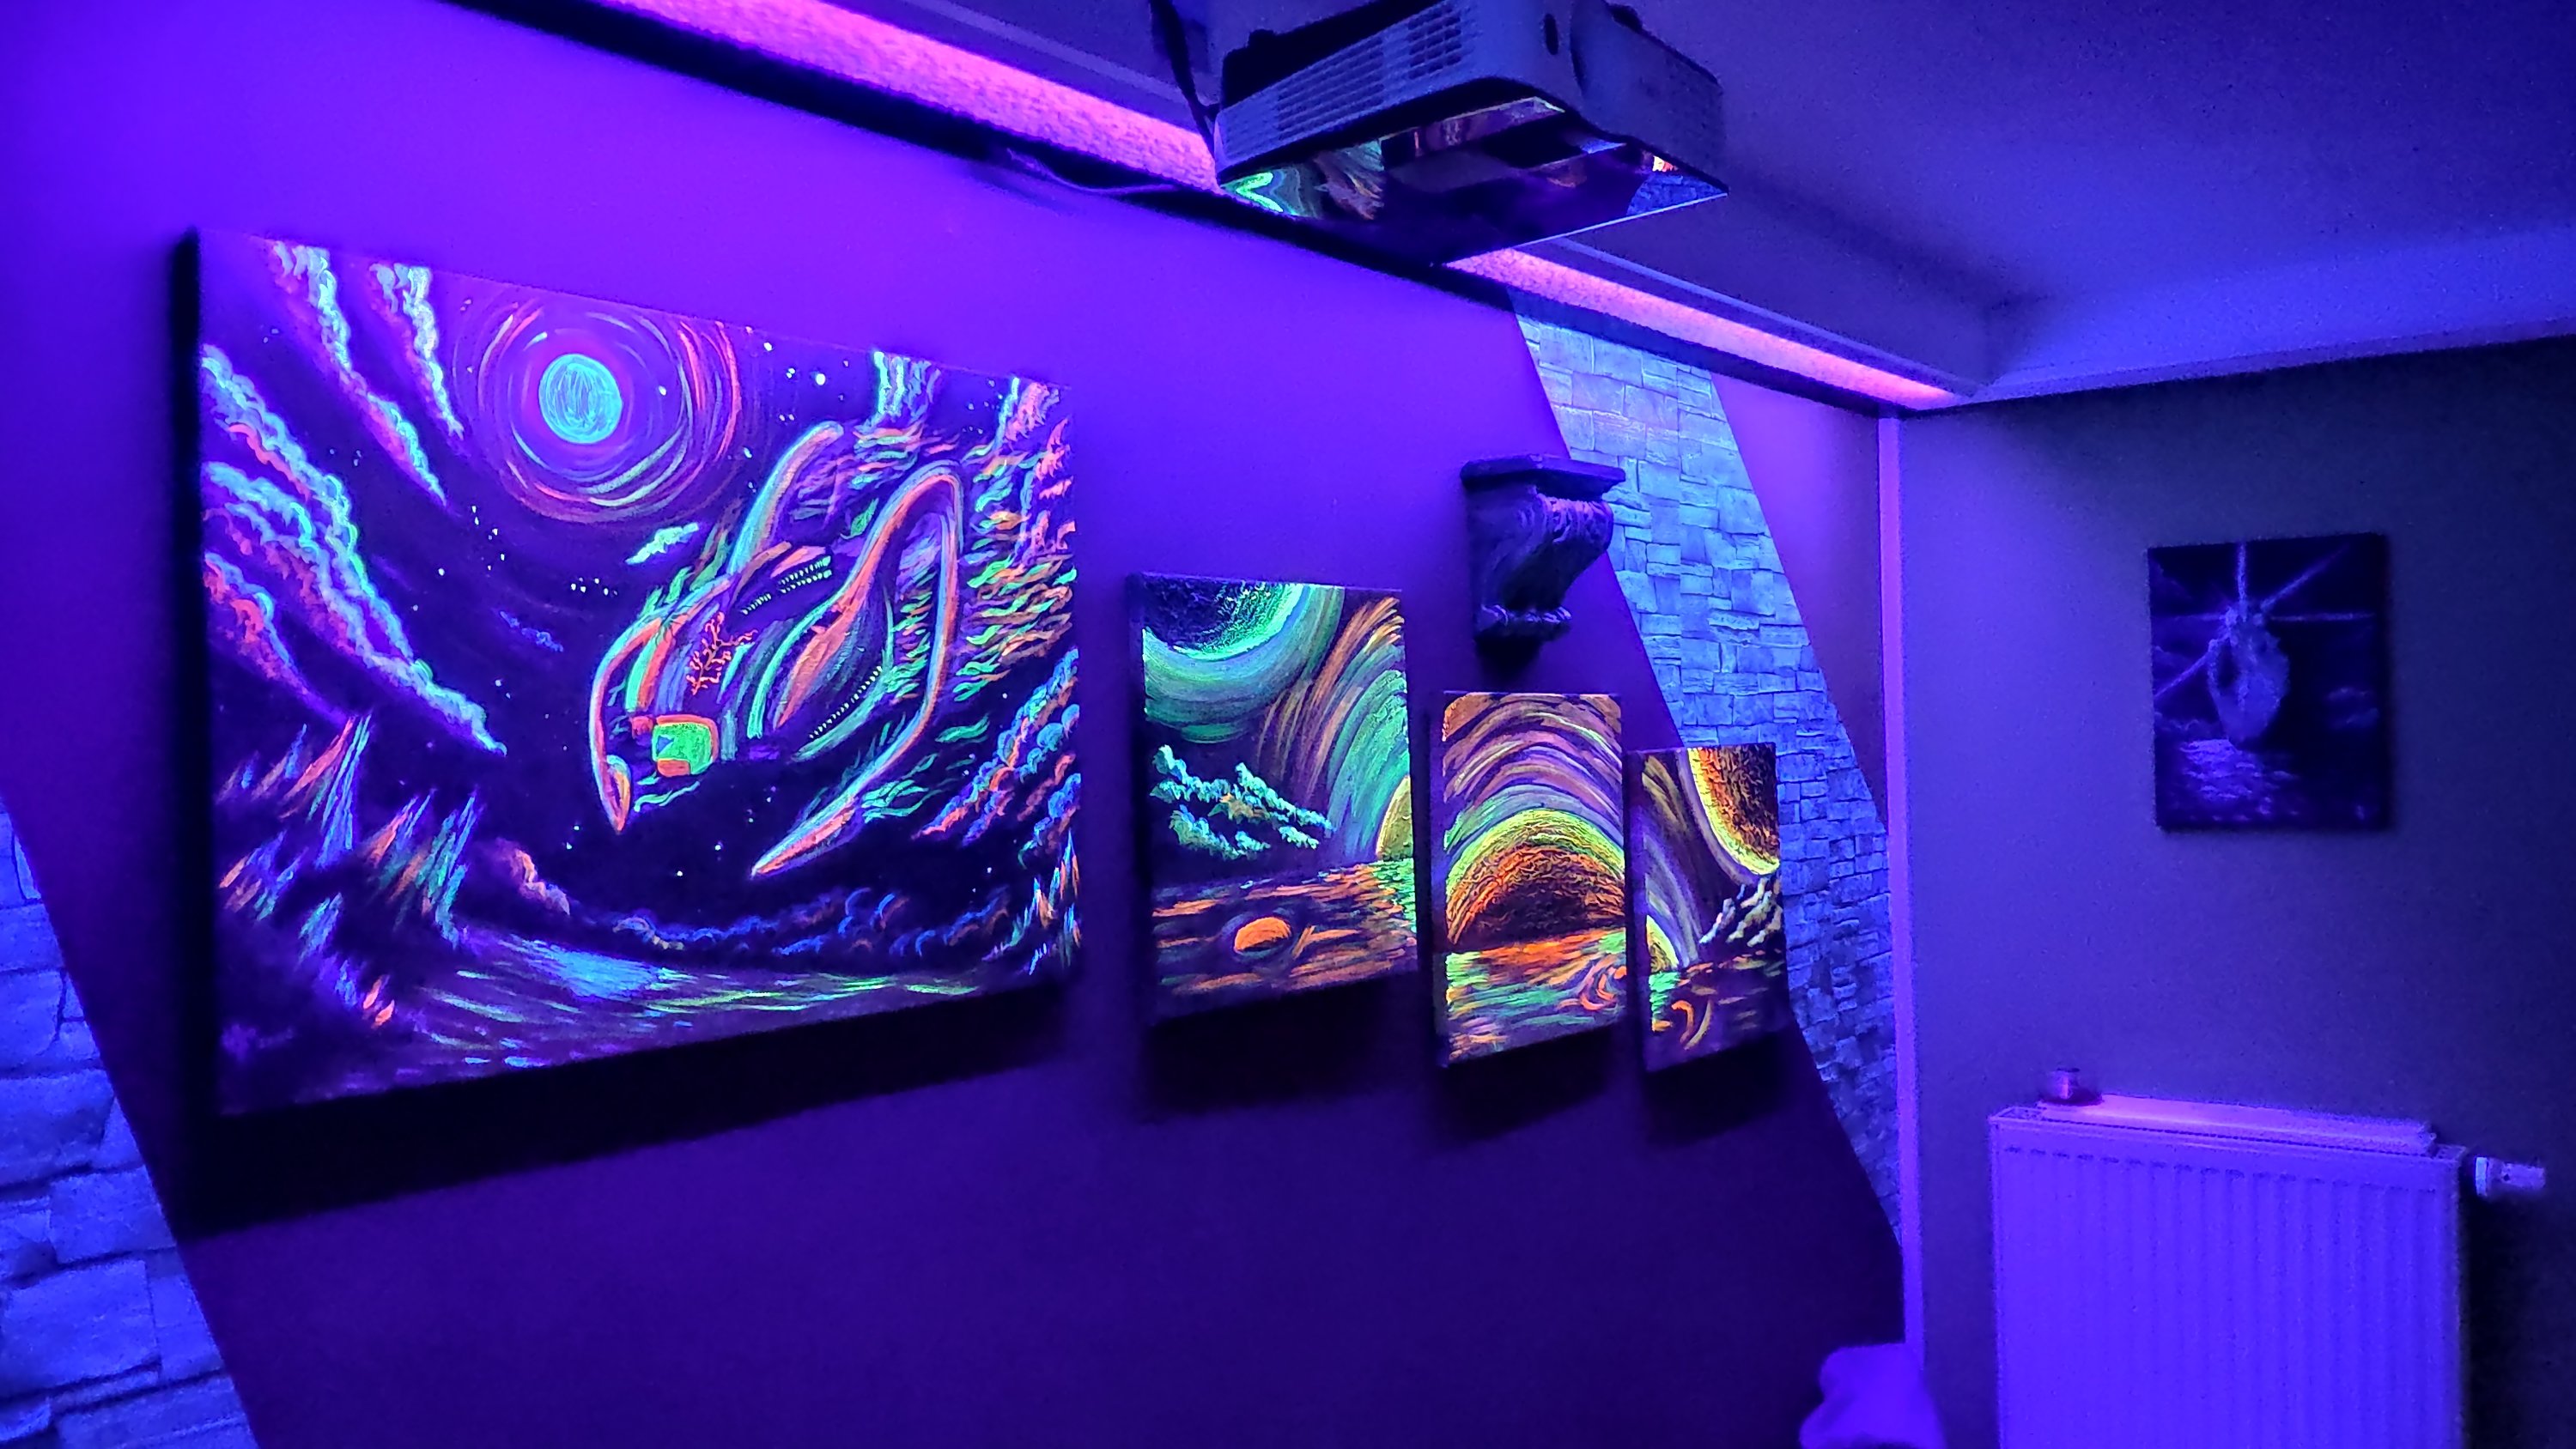
- which has a night light which starts automatically at night
- using black light for some extra style
Supplies:
- a radio controlled clock module (this one)
- round acrylic glass
- wodden base
- wire for the structure
- dry braches
etc. to be specified in the next steps
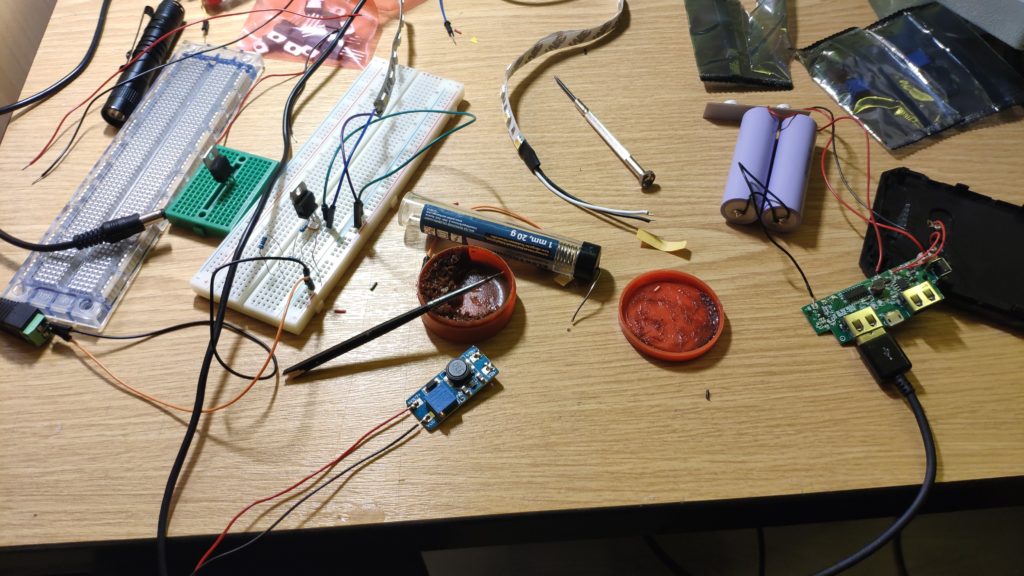
OK, so I started with the electronics. In this part I wanted to do the following:
- night light using some 5050 led strips
- black light using 5050 uv light led strips (396 nm light)
- make it all with solar charged batteries using this ripped up diy kit
- charge by day and go on automatically by night
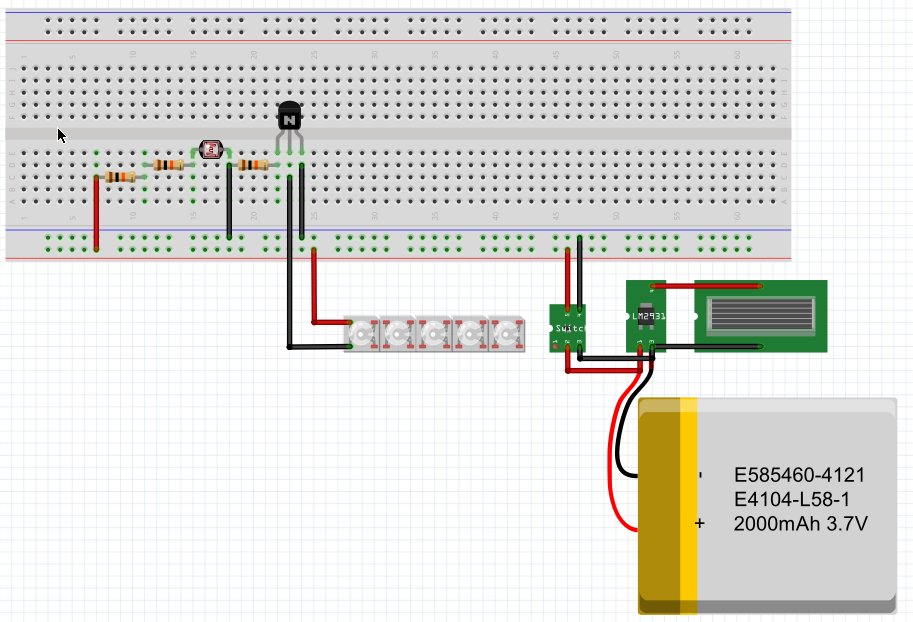
So I started putting all together like shown in the fritzing sketch: 3x 10kO resistors, a simple photoresistor and a TIP120 transistor. All connected with the 12V leds and the 3.7V battery/solar charging module (also used a 3.7V to 12V voltage step-up converter)
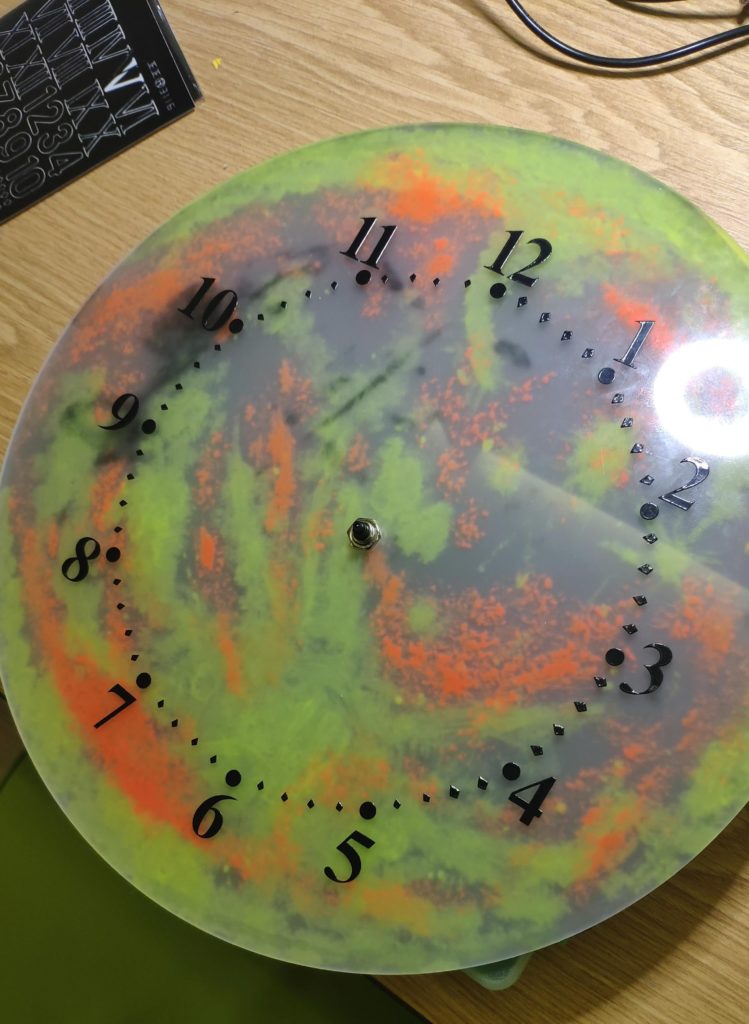
I went on to build the actual clock. I started painting the back side of the acrylic glass with:
Amsterdam Specialities – black light reflective paints
Started with yellow, and went on with some orange/red to give it a moon-like structure paint. While painting it I used a black light flash light to check the effect.
After that I fixed the clock module in the center of the glass.
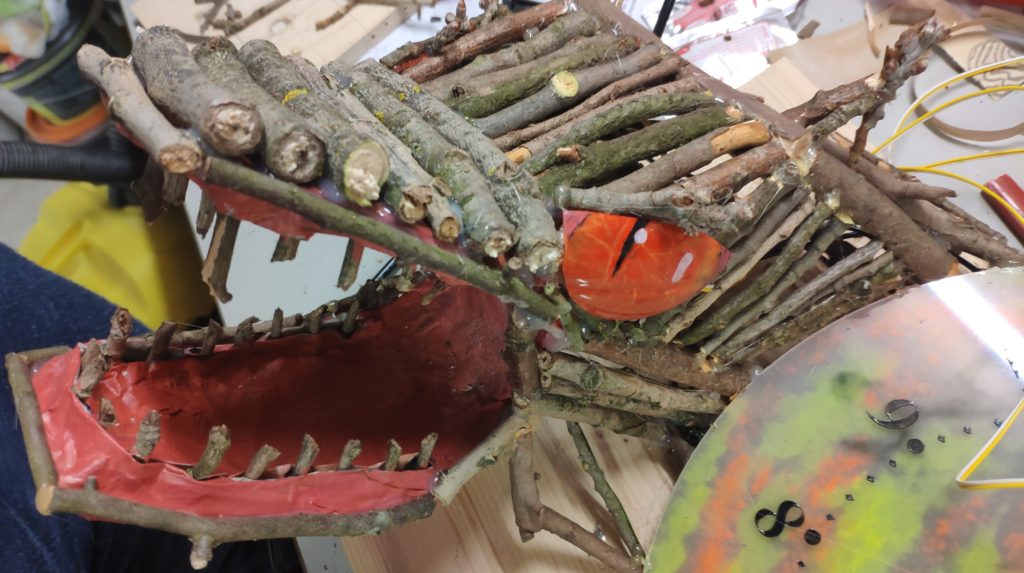
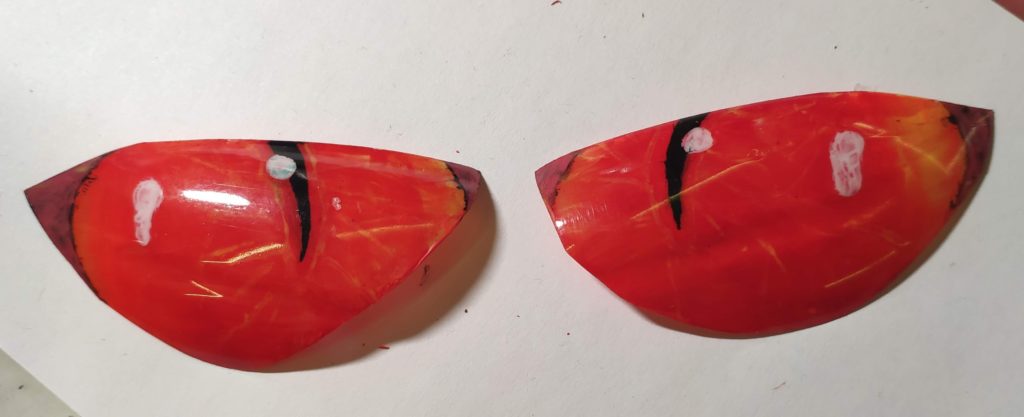
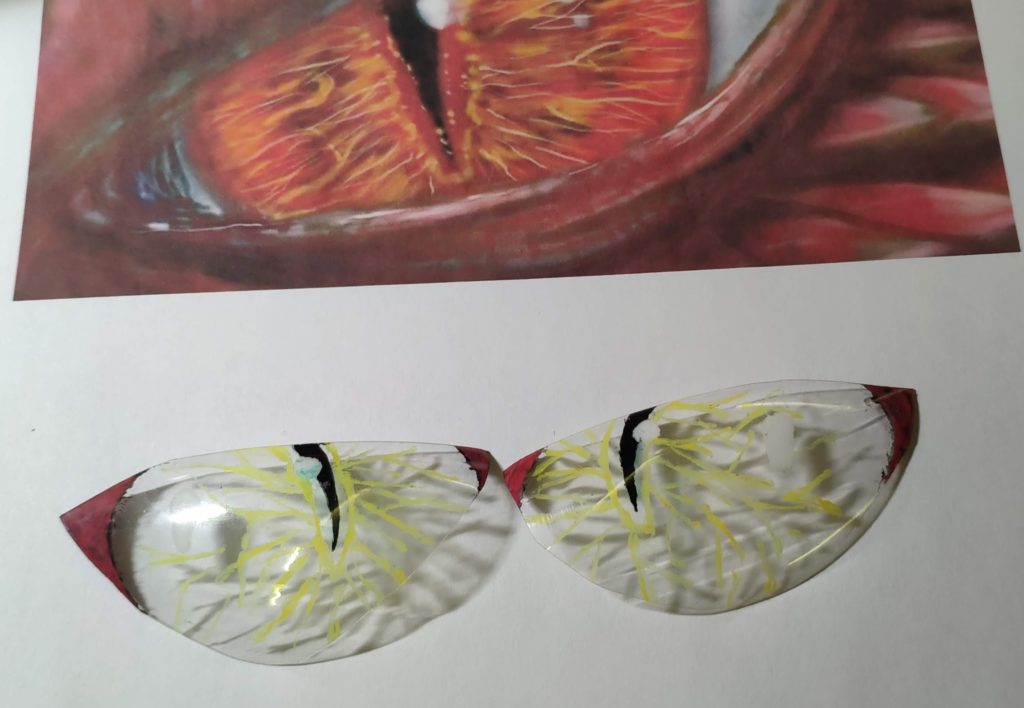
OK, for the eyes you need to take the time since they have to be nice.
First I printed something from the internet, in the style I wanted. Then I cut out the form from the bottom of a plastic bottle. Then I painted them on the inside starting with black, then yellow, then the red base.
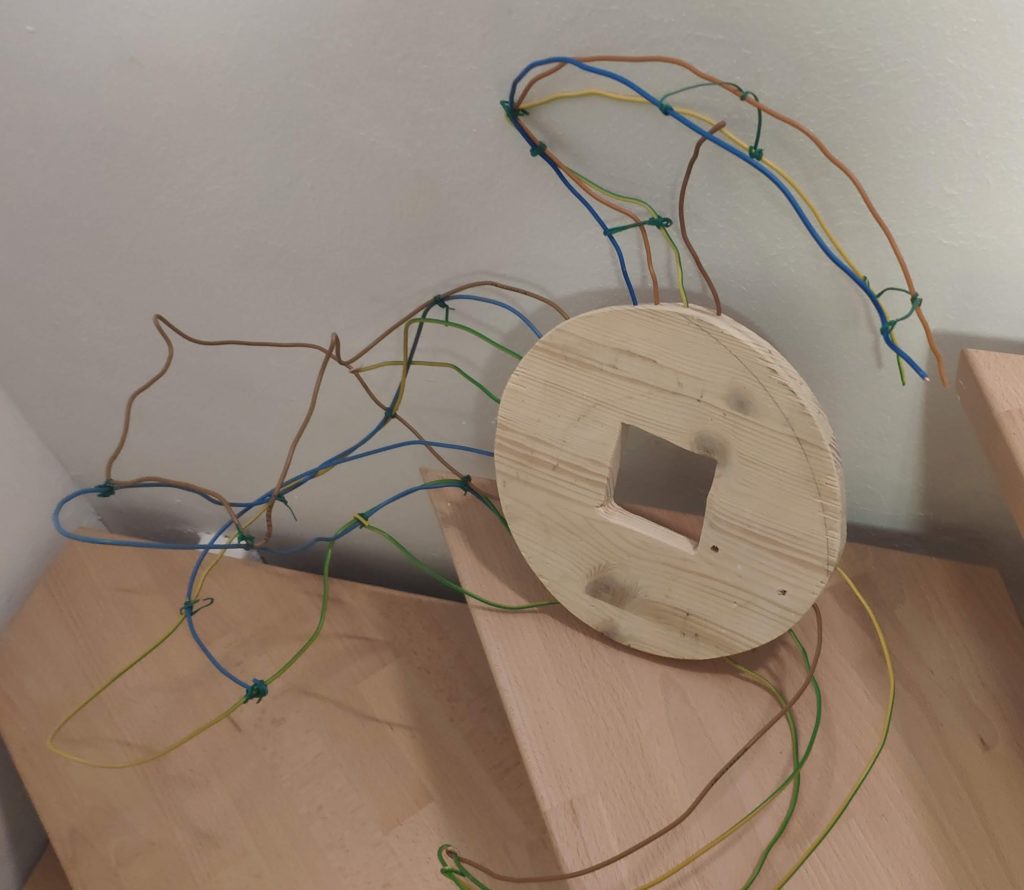
Then I cut out a wooden circle and inside a rectangle to fit the clockwork.
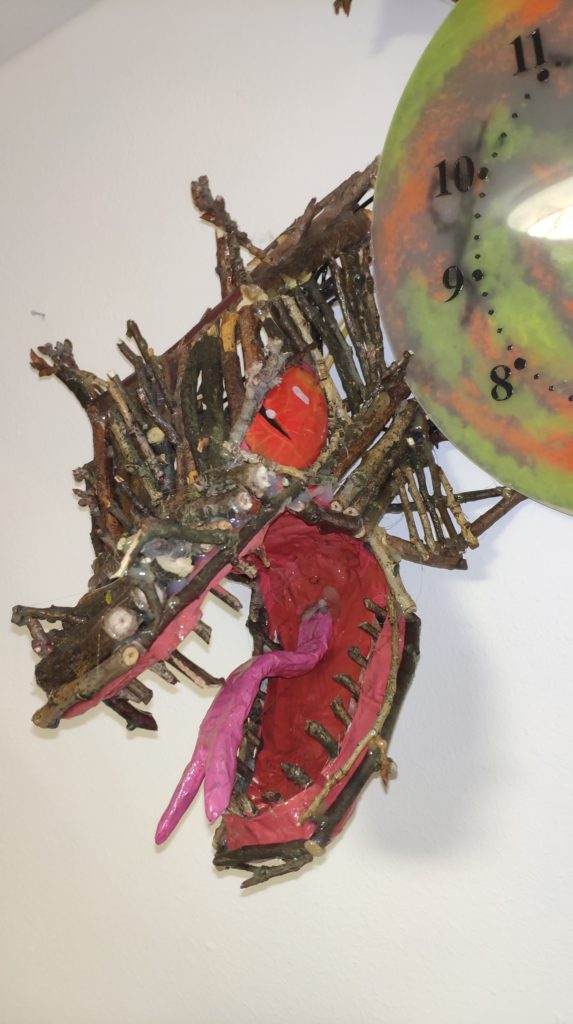
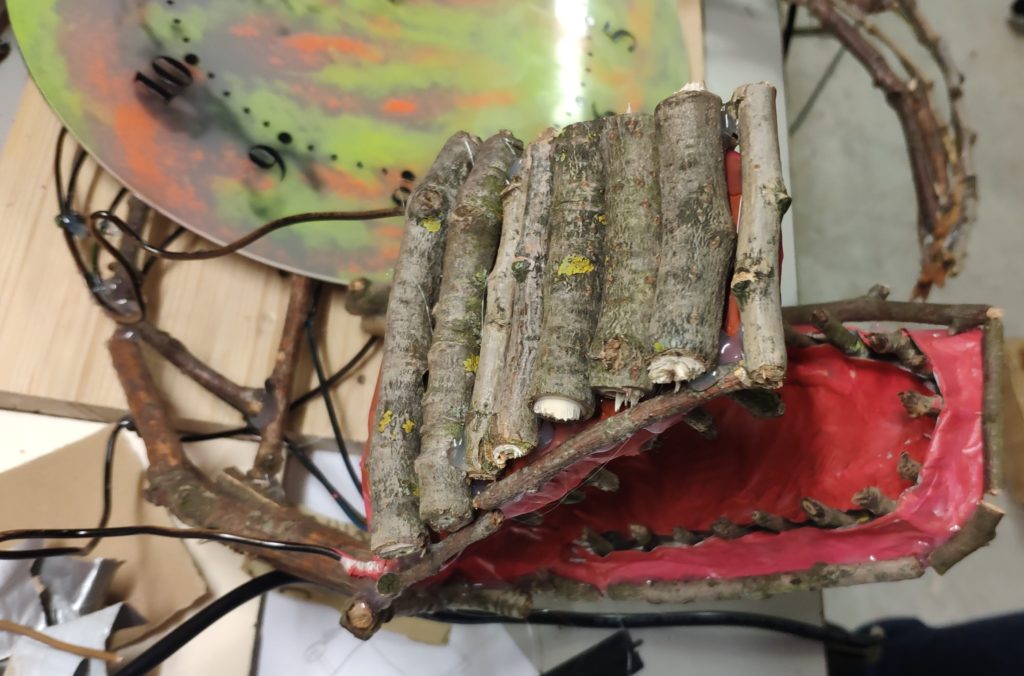
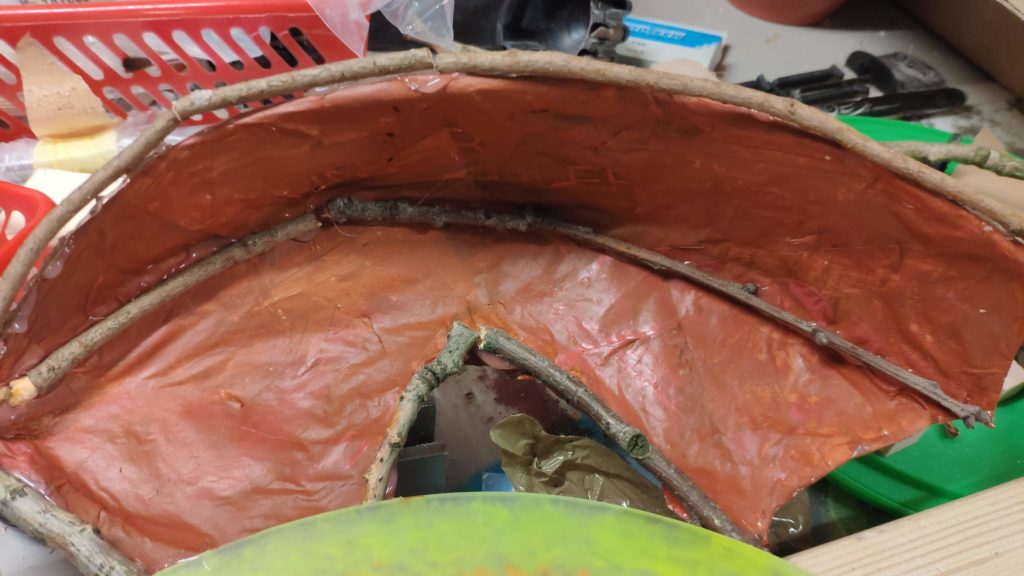
Then using a lot of wire I started to form the base of the dragon, which later on had to hold the branches and twigs. It consists of 3 parts: the head, the wings and the tail.
I had to watch the form having in mind that the mouth should be lit, the eyes need a plain spot, the wings need to cover the black light led strips and hold the solar charging module.
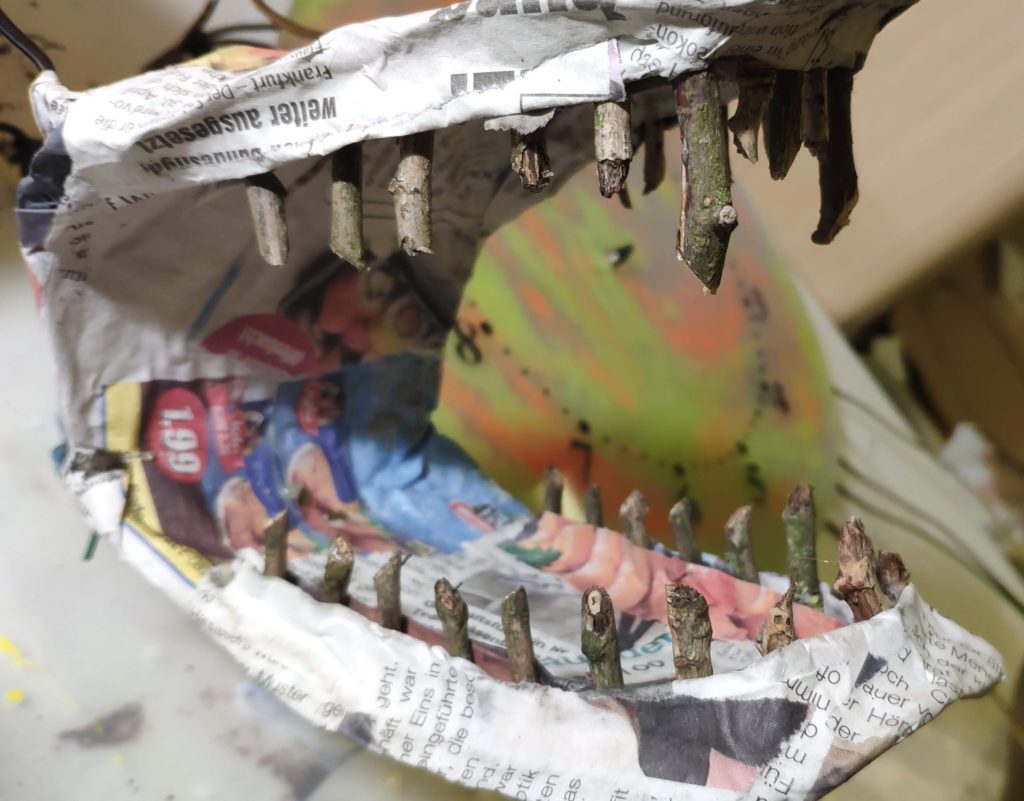
Now every part of the dragons I planned to do with twigs, but the inside of the mouth and the wings had to look more real so I used some papermache, which will be painted red in the next step.
The teeth (also twig parts) I fixed first with hot glue, and covered with papermache.
For this next step I almost melted my hot glue gun 🙂
I started covering all the base of the dragon with cut twigs, following its form and body parts. It took some time but it is really fun to see how he grows 🙂
Also used some twigs on the wings to give everywhere the impression this dragon consists only of bones … hence “Bone Dragon”
For some finishing touch we made it all shiny with a clear coat spray. I sprayed some more on the inside of the mouth.
At the end I put on the electronics and glued all parts in place:
- the photoresistor is on its tail
- the solar panel on the wings
- the black light led strip is under the wings
- 3 small light strips (3 leds each) are under the eyes and in the mouth
So when lit, the paints on the moon start to reflect the light looking like glowing.
Hope you had fun, we sure did 🙂

UV paint on top
Had some very old paintings of mine hanging around. And since my new hobby room was quite empty, I thought about decorating it with some uv light. Just added a layer of uv paint on the paintings, almost not visible using daylight. But when using the night mode, we get a nice and cozy ambient light.

Christmas tree – Arduino Leds
Video: https://youtu.be/7wwv_Az_uWw
Actually this is a project which I started last year and was not able to finish it then.
Using WS2811 led lights (not strips) I thought about making a Christmas tree light being able to control every single led using an Arduino. This is actually very simple. For about 100 lights, I used a 10A power source just to be sure. Also next year I might add another 50 lights to it.
The best part about it is the programming. I found a lot of programs online. Took the nicest one, combined and tweaked them, and here is the result…


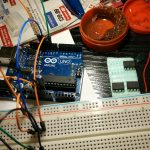
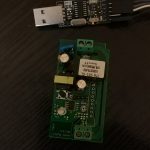
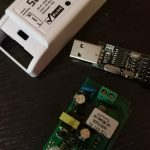
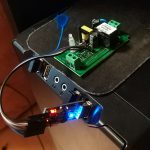
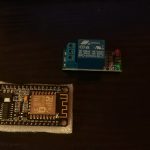
Home automation with Xiaomi, Raspberry, NodeMCU and Sonoff+Tasmota
This is gonna be a long post and will be edited from time to time.
So I have this Xiaomi Home Automation system which served me well in the past, and still does. But in time I built more stuff myself which I would like to integrate into one system.
I started off with Home Assistant even though other systems still have potential (OpenHAB, etc). This is an open source home automation system to work with Raspberry Pi 3.
A nice feature of Home Assistant is the use of Snips.ai, a voice recognition addon similar to Assistants like Alexa and Google Assistant but which works completely offline and can control your devices.
Another big advantage of Home Assistant is that most of the Xiaomi components I have can be controlled using it. And on top of this I can use Sonoff modules (which are very cheap and can connect via Wifi and control any electronics in the house) with Tasmota firmware which gives them MQTT capabilities and lets me integrate them in Home Assistant.
Still a lot to go and to configure until the final system is ready, but that’s the fun …


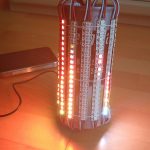
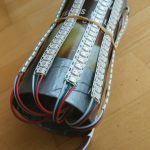
Fire lamp (final)
This is the continuation of http://blog.familie-fratila.de/fire-lamp/
Also posted it on Instructables:
https://www.instructables.com/id/Fire-Lamp-1/
After buying a normal lamp, just to take the “shell” of it, I had now all the parts I needed to build the final Fire Lamp.
I stripped the bought lamp of all inside electronics, and replaced it with my own. The glass of the lamp, gives it now pretty nice effect. Besides some tweaks and maybe more programs coded, I can say it is finished.
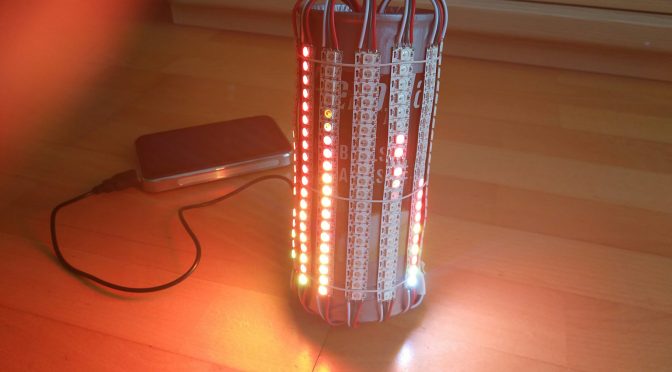
Fire lamp
I found a lot of intersting ideas on the internet on how to make a fire simulation lamp using WS2812c programmable leds and Arduino. So I had to try this too. Spice up the romance that is 😉
I found a strip with leds very close put together, so the effect would also look nice. Everything is powered by a 5v power bank, so you can just take it with you wherever you want to set a romantic mood 😉
To do: make a lamp with white glass around the electronics to diffuse the light from the leds so not every single one is visible.
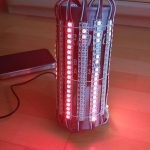
I used the NeoPixel library to program the leds, also I used parts of code I found on the internet and adapted it. Also a Arduino Nano was enough to control all 140 leds alligned in groups of 20.
The electronic layout looks something like this, but I used 7 rows of 20 leds each:
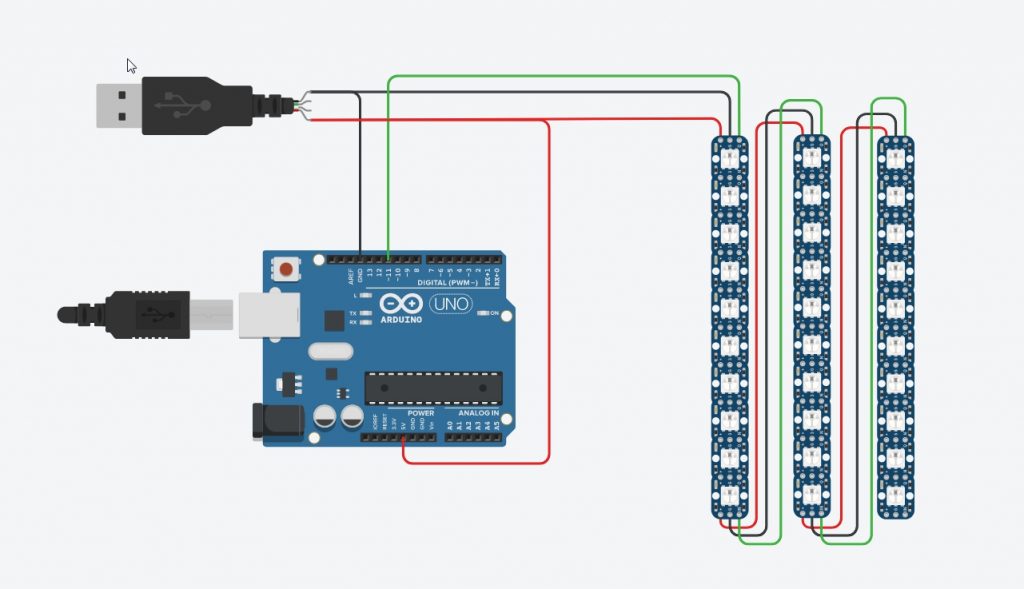
Also if someone is interested in the code, here it is attached. Of course it can be improved a lot. I also plan to make multiple modes of this lamp to be able to select by button fire, lava lamp, snow flakes, etc…
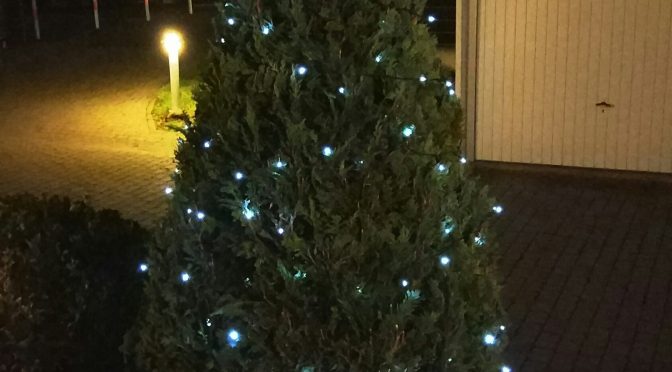
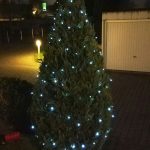
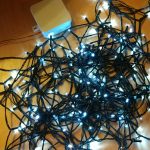
Outdoor christmas decoration
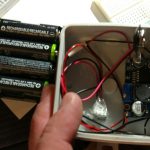
So I got theese outdoor Christmas leds from China, solar powered ones. Like I expected, the lack of sun in Germany, especially on that side of the house where I intended to put them, was a big issue.
Another slight issue was that the children were so happy about the first snow, that they didn’t see it and ripped of the wire.
So my solution was to put everything on 4 AA batteries, and also on a Attiny85 microcontroller, and program the leds to automatically light up at 18:00 o’clock and turn off at 22:00.